Configuration
The GA4GH reference server Configuration file. allows Flask and application specific configuration values to be set.
Configuration file
The GA4GH reference server is a Flask application and uses the standard Flask configuration file mechanisms. Many configuration files will be very simple, and will consist of just one directive instructing the server where to find the data repository; example, we might have
DATA_SOURCE = "/path/to/registry.db"
For production deployments, we shouldn’t need to add any more configuration than this, as the other keys have sensible defaults. However, all of Flask’s builtin configuration values are supported, as well as the extra custom configuration values documented here. For information on preparing a data source see Data repository .
When debugging deployment issues, it can be very useful to turn on extra debugging information as follows:
DEBUG = True
Warning
Debugging should only be used temporarily and not left on by default. Running the server with Flask debugging enable is insecure and should never be used in a production environment.
Configuration Values
- DEFAULT_PAGE_SIZE
- The default maximum number of values to fill into a page when responding to search queries. If a client does not specify a page size in a query, this value is used.
- MAX_RESPONSE_LENGTH
- The approximate maximum size of the server buffer used when creating responses. This is somewhat smaller than the size of the JSON response returned to the client. When a client makes a search request with a given page size, the server will process this query and incrementally build a response until (a) the number of values in the page list is equal to the page size; (b) the size of the internal buffer in bytes is >= MAX_RESPONSE_LENGTH; or (c) there are no more results left in the query.
- REQUEST_VALIDATION
- Set this to True to strictly validate all incoming requests to ensure that they conform to the protocol. This may result in clients with poor standards compliance receiving errors rather than the expected results.
- INITIAL_PEERS
- When starting, you can set a list of initial peers to contact using a simple text file. Add a URL per line for peers you would like to add to the registry as initial peers. Each time the server starts, this set of peers will be announced and added to the registry.
- LANDING_MESSAGE_HTML
- The server provides a simple landing page at its root. By setting this value to point at a file containing an HTML block element it is possible to customize the landing page. This can be helpful to provide support links or details about the hosted datasets.
- OIDC_PROVIDER
- If this value is provided, then OIDC is configured and SSL is used. It is the URI of the OpenID Connect provider, which should return an OIDC provider configuration document.
- OIDC_REDIRECT_URI
- The URL of the redirect URI for OIDC. This will be something like
https://SERVER_NAME:PORT/oauth2callback. During testing (and particularly in automated tests), if TESTING is True, we can have this automatically configured, but this is discouraged in production, and fails if TESTING is not True. - OIDC_CLIENT_ID, OIDC_CLIENT_SECRET
- These are the client id and secret arranged with the OIDC provider, if client registration is manual (google, for instance). If the provider supports automated registration they are not required or used.
- OIDC_AUTHZ_ENDPOINT, OIDC_TOKEN_ENDPOINT, OIDC_TOKEN_REV_ENDPOINT
- If the authorization provider has no discovery document available, you can set the authorization and token endpoints here.
- CACHE_DIRECTORY
- This directory is used to share data between processes when the server is
run in a production environment. It defaults to
/tmp/ga4gh/. - SECRET_KEY
- The secret key used by the server to encrypt cookies. Preferably, this should be a long (~24 characters) random string, however any string will work.
- AUTH0_ENABLED
- When set to true, enables authentication via Auth0.
- AUTH0_SCOPES
- These are the login identity providers that an Auth0 application is configured to accept. More about scopes can be seen here.
- AUTH0_CALLBACK_URL
- This configuration value let’s Auth0 know which URL to return a session to after authentication. It should match the setting in your Auth0 configuration.
- AUTH0_HOST
- The Auth0 host is the domain under which the Auth0 account is hosted.
- AUTH0_CLIENT_ID
- Each application is authenticated to your Auth0 account using a Client ID and secret. This is available in the Auth0 configuration.
- AUTH0_CLIENT_SECRET
- The client secret is a preshared key between your instance of the server and Auth0 and is available in the Auth0 configuration panel.
- AUTHORIZED_EMAILS
- A comma separated list of user
Configuring Auth0 Service
First login or sign up in Auth0 website: https://auth0.com/
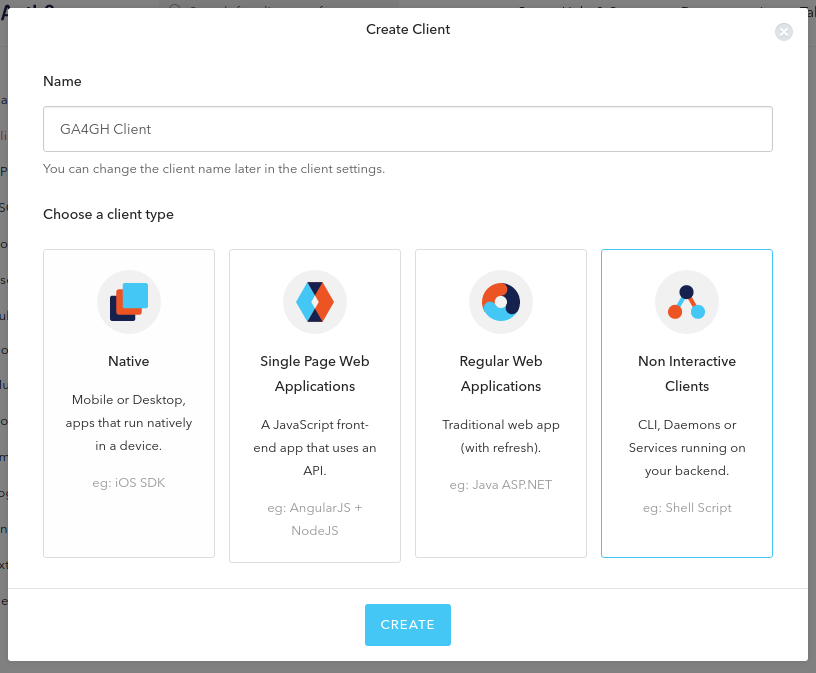
Creating Client
On tab Client click in Create Client. Give a name for your
Client and choose the Non Interactive Clients client type. Click
Create.
In Settings tab copy the Domain, Client ID and
Client Secret data.

These data will be used to set the following server configuration values
(reference):
- AUTH0_HOST with Domain; - AUTH0_CLIENT_ID with
Client ID; - AUTH0_CLIENT_SECRET with Client Secret.
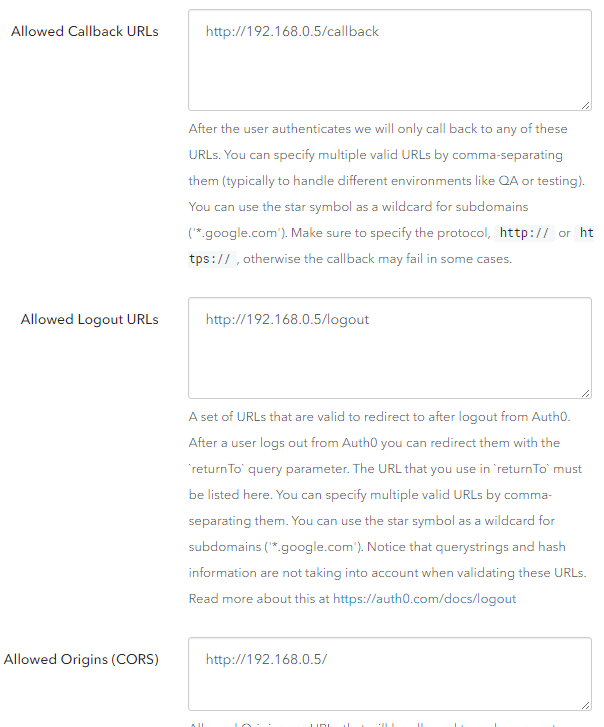
Fill Allowed Callback URLs, Allowed Logout URLs and
Allowed Origins (CORS) with the web address of server endpoint plus
the related path.
Creating API
Go to APIs tab and click in Create API. The Identifier
should be the URL of server endpoint (the landing page). For this
example I am using root path and TCP port 80.
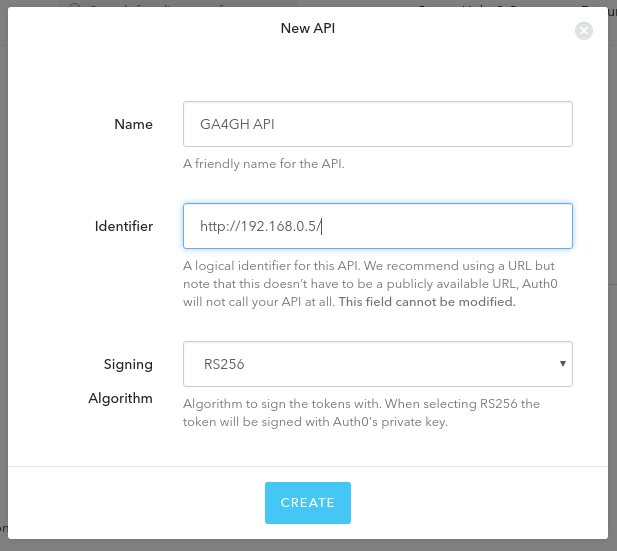
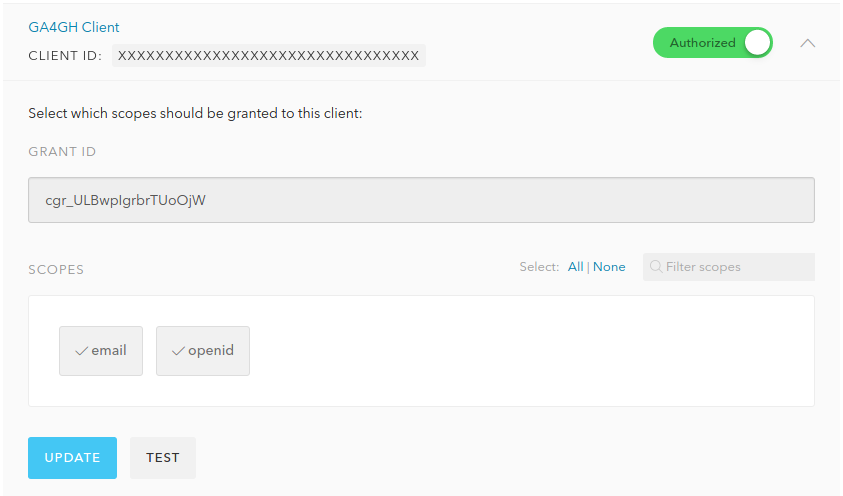
On Scopes tab, create two scopes: openid and email.
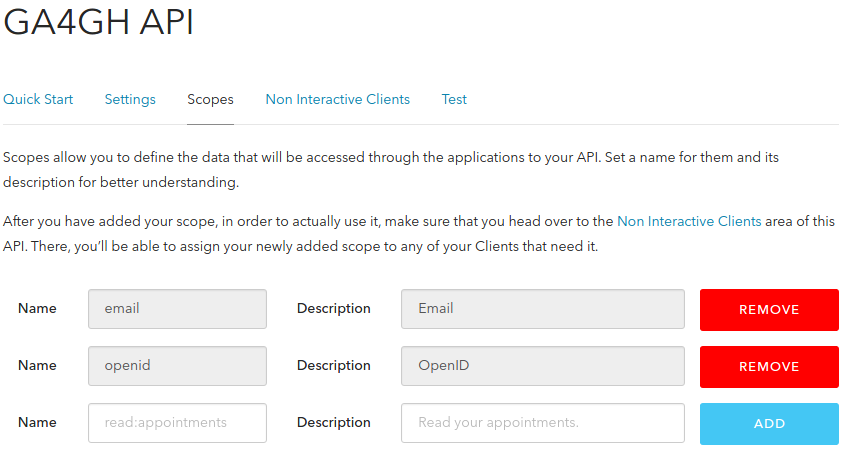
On Non Interactive Clients tab, authorize the previous created
Client. Select both scopes openid and email. Click Update
then Continue.
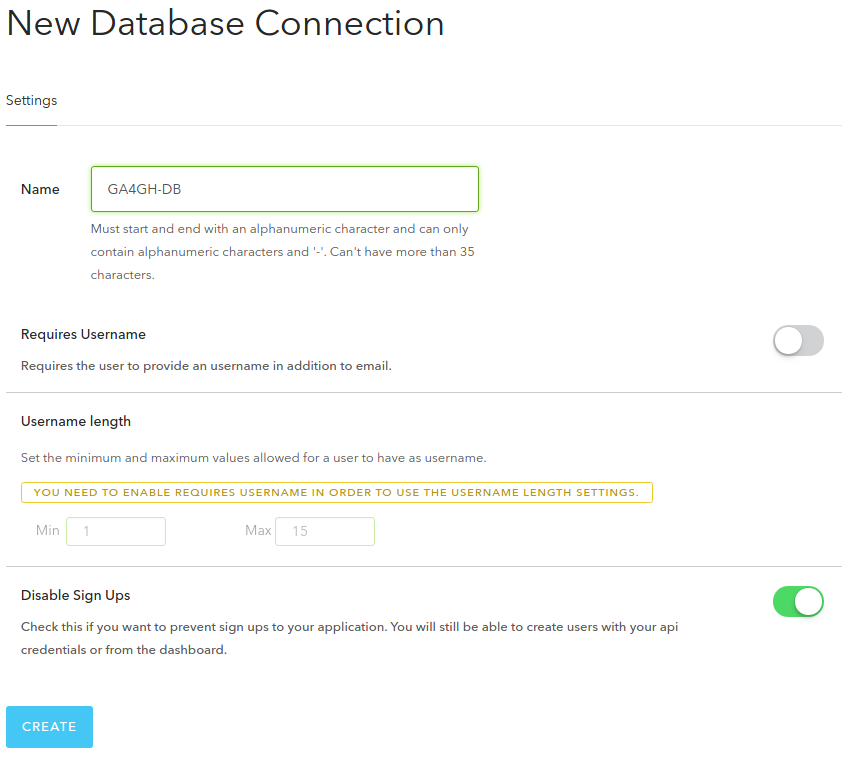
Creating Database Connections
Go to Connections-Database tab and click Create DB Connection. I
disabled sign ups because I want to have control over user creation
allowing only certain people/software to have access on server.
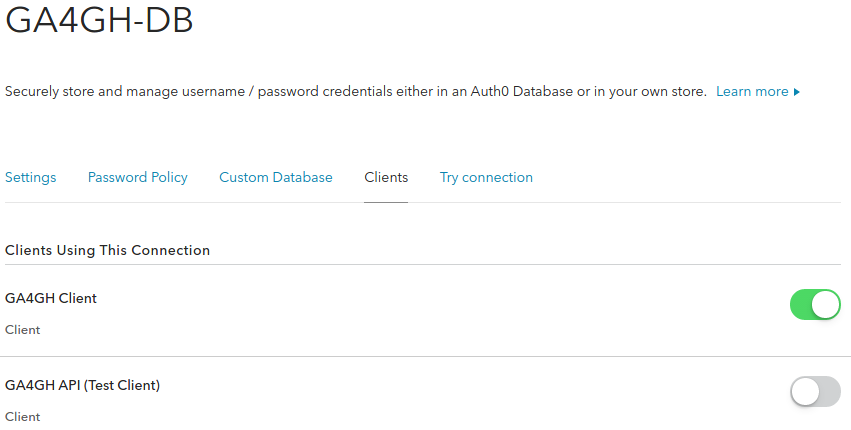
In Clients tab, activate the connection between the Client and the
Database.
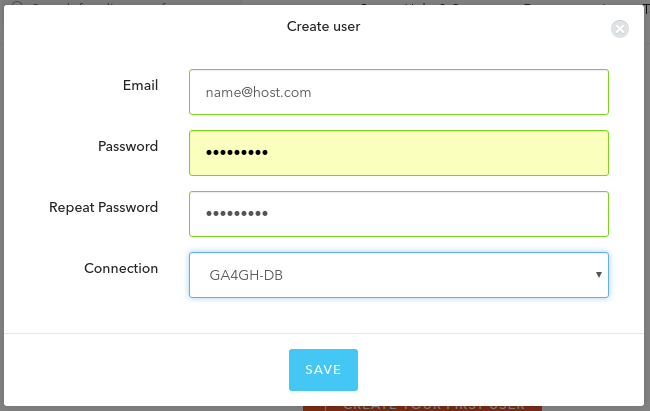
Creating Users
Go to Users tab and click Create User. Fill the fields.
Connection should be same one previously created. An email will be
send requesting to verify. I recommend creating your own user for
testing purposes.
Setting up GA4GH server with authentication
Append the following server configuration values to config.py file
(reference). Remember to
update the fields correctly. Create a SECRET_KEY. I didn’t understand
the field AUTH0_AUTHORIZED_EMAILS. I just used the same email I used
to login into Auth0 website.
AUTH0_ENABLED = True
SECRET_KEY = "super_secret"
AUTH0_SCOPES = "openid email"
AUTH0_CALLBACK_URL = "http://192.168.0.5/callback"
AUTH0_HOST = "USER.auth0.com"
AUTH0_CLIENT_ID = "XXXXXXXXXXXXXXXXXXXXXXXXXXXXXXXX"
AUTH0_CLIENT_SECRET = "XXXXXXXXXXXXXXXXXXXXXXXXXXXXXXXXXXXXXXXXXXXXXXXXXXXXXXXXXXXXXXXX"
AUTH0_AUTHORIZED_EMAILS = "name@host.com"
Restart the server.
Testing
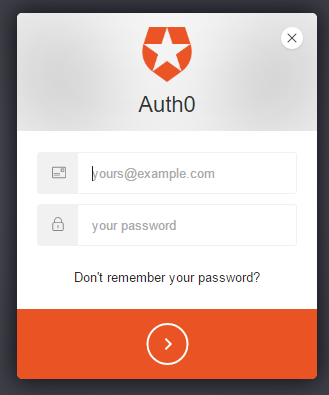
Finally access server landing page. It will show an error and a link to login. At login page, use the same email and password used to create a user. Note that it does not have an option to create a user (it can be changed).
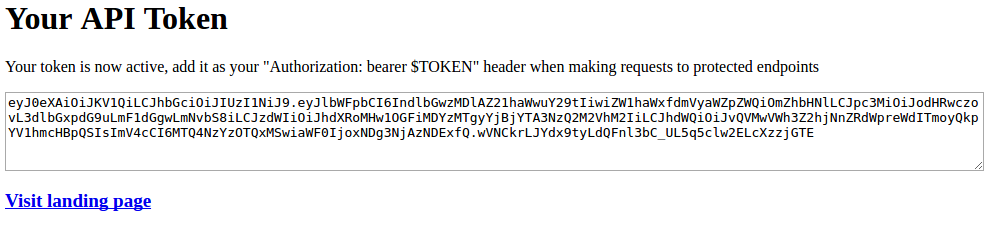
After login you will see the token page.
OpenID Connect Providers
The server can be configured to use OpenID Connect (OIDC) for authentication. As an example, here is how one configures it to use Google as the provider.
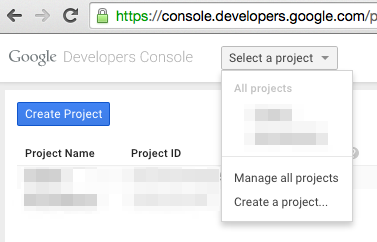
Go to https://console.developers.google.com/project and in create a project.
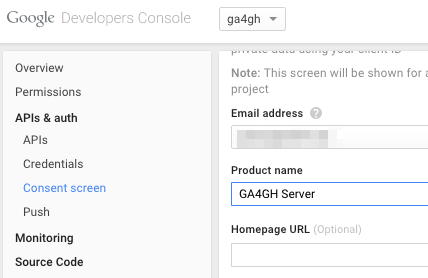
Navigate to the project -> APIs & auth -> Consent Screen and enter a product name
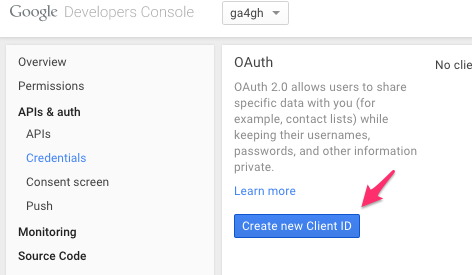
Navigate to project -> APIs & auth -> Credentials, and create a new client ID.
Create the client as follows:
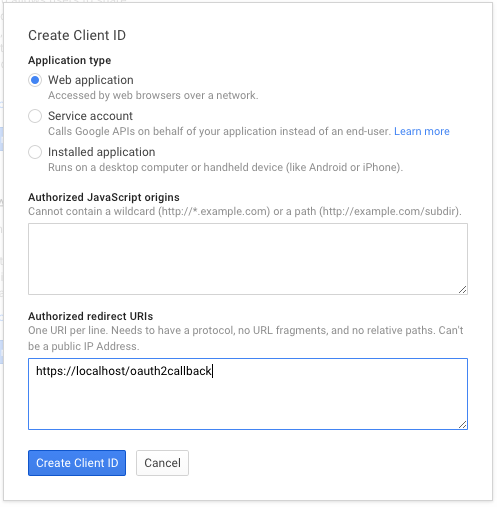
Which will give you the necessary client id and secret. Use these in the OIDC configuration for the GA4GH server, using the OIDC_CLIENT_ID and OIDC_CLIENT_SECRET configuration variables. The Redirect URI should match the OIDC_REDIRECT_URI configuration variable, with the exception that the redirect URI shown at google does not require a port (but the configuration variable does). Finally, set the SECRET_KEY to any string for storing cookies.
